How to Install a Trampoline Bed and Springs

Installing Square & Rectangular beds

For square and rectangular trampolines, attach the corner springs first. Begin at all 4 corners by attaching a spring to the bed’s red clip by sliding the spring hook into the top of the red clip hole. Pull and stretch the spring so the opposite spring hook is looped over the wiggle wire of the trampoline frame. Springs should be perpendicular to the the frame and bed.

Once all corner springs are attached, attach the side springs (beginning with the shorter sides for rectangular trampolines). Attach 3-5 springs and alternate to the opposite bed side. Add 3-5 springs directly opposite of the springs you’ve just attached. This method ensures the tension of one bed side will not be too overly taut to stretch. Continue attaching and alternating springs 3-5 at a time until both sides are attached.

Once both sides are attached, work the adjacent sides in the same manner. If you find installing the bed and springs are still difficult, a second person can aid by pushing on the opposite side of the bed to reduce tension while attaching the springs from the bed to the frame. 

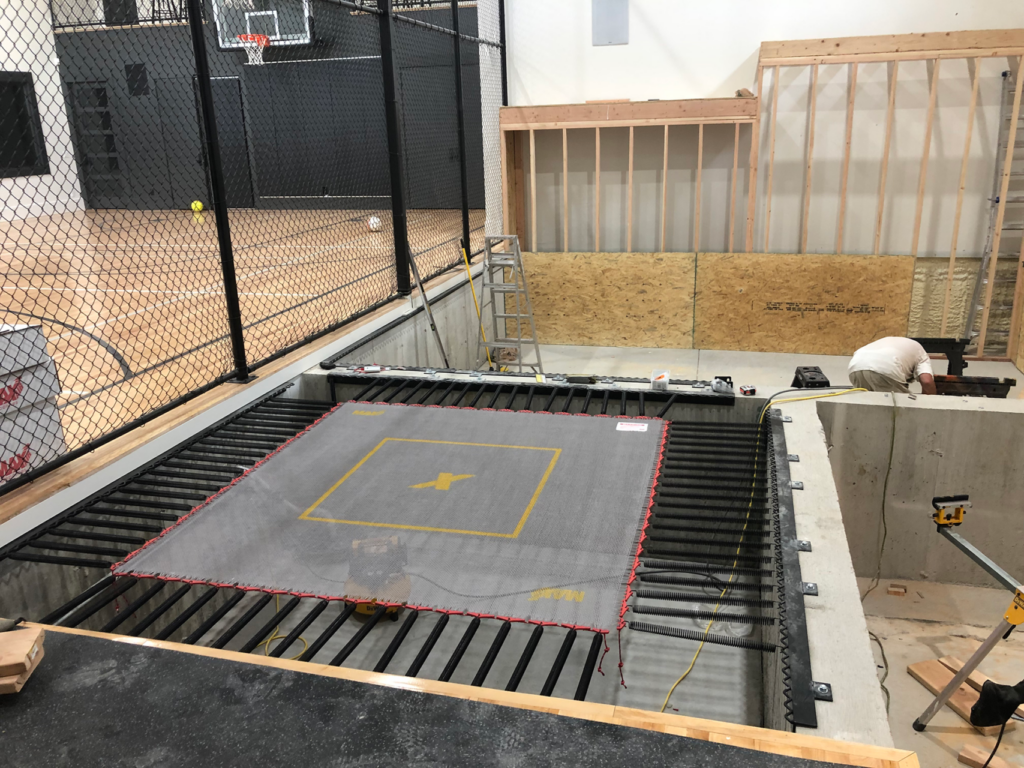
Indoor super quad trampoline with a gray bed and yellow MaxAir markings.

Installing Circular beds

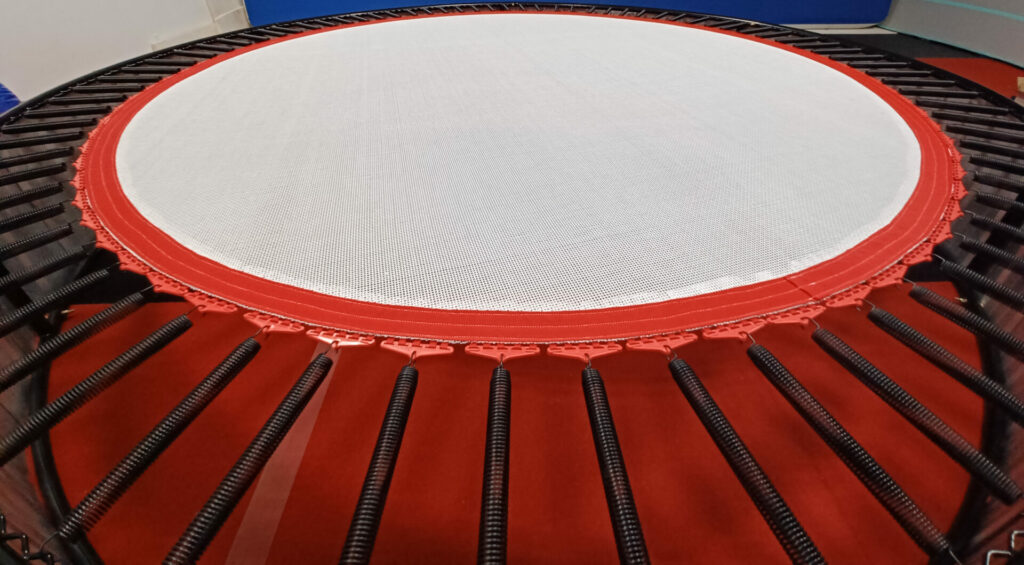
For circular trampolines, begin with a single spring. Attach a second spring to the fly bed directly across from the first spring on the opposite side of the bed. Attach the spring to the wiggle wire of the trampoline frame. Both springs should be set at 12:00 o’clock and 6:00 o’clock positions.

Attach 2 more springs following the same procedure at 3:00 o’clock and 9:00 o’clock positions. Attach the remaining springs by alternating spring attachments. This method allows for an installation without adding too much tension or rendering the opposite side of the trampoline bed too tense to stretch.

Attach a single spring to the bed and frame beside the 12 o’clock position. Next, attach a single spring to the bed and frame beside the 6:00 o’clock position.

Then, attach a spring beside the 3:00 o’clock position, followed by a spring attached beside the 9:00 o’clock position. Continue in this manner until your trampoline bed is installed.

Find your trampoline

More Frequently Asked Questions

There’s no one-page instruction sheet with MaxAir. We’ll help you find a contractor who knows a thing or two. Learn more.
Discover why MaxAir exists and the drive it takes to be the best. Learn more.
Just because it’s on sale doesn’t mean your kids will like it more. Learn more.
We want every trampoline to be the key to unlocking a family’s fitter future. Learn more.
From your home to Hollywood, we’re up for the challenge. Learn more.

We take safety into consideration when we build each trampoline, no matter if it’s for competition or recreational use. Learn more.

Normal wear and tear is just that, normal. That’s why we made it simple for you to fix issues on site. Learn more.

Safety and enjoyment is why every product we make creates a one-of-a-kind experience. Learn more.

Ever wanted to train like an Olympian? Now you can with an in-ground trampoline. Learn more.

Learn how to fix your own trampoline strings so you can jump back into action. Learn more.

Share

Read our blog

Join Our Mailing List to Unlock Your Free Guide, Receive Discounts & More!

Join Our Mailing List to Unlock Your Free Guide, Receive Discounts & More!

By subscribing to our newsletter, you'll discover the Top 4 Reasons You Don't Buy Cheap Trampolines.

You have Successfully Subscribed!